The first "task of lining" that is present on the little bag that I prepared for the blog candy, grilled and very simple form, or trapezoidal. Taken
model grilled having already assembled - forward + back - I have placed over a soft surface trying to spread as widely as possible, but natural (I know that the photo is diffent, in fact I did the opposite but fortunately is not nothing serious happened!)
model grilled having already assembled - forward + back - I have placed over a soft surface trying to spread as widely as possible, but natural (I know that the photo is diffent, in fact I did the opposite but fortunately is not nothing serious happened!)
 I stopped the model on the underlying surface with the use of pins
  and measured the size of the piece: height (32 cm) and two different widths rope (27 cm) and bottom (36.5 cm)
Taking the cloth of cotton, which in this case was pretty thin, I folded in half, matching the selvage (or I wanted to do it ....)
Brief aside: The selvages are the lateral extremities of the piece of cloth, or the edges of the finished piece, and the distance between the side edges corresponds to height of the cloth, while the length that value is variable depending on how much it is purchased. However
continue ....
usually cotton fabric is a stable and folding the cloth as this should not occur wrinkles or creases, but the opposite could happen, as in

then I tried to fix the cloth to the eye so that the bend was perfectly smooth, even if the selvages no longer corresponded perfectly (they were pants would be serious but a lining can turn a blind eye).
With a sheet of translucent paper with the measured values \u200b\u200babove I have reproduced in this paper the model of the bag in one piece comprising both the front and the rear (see photo below)
Above I put the folded cloth model in the paper so that one of the peaks of the model were parallel to the fold of the cloth (Or selvedge if they were matched).Note: the photo below the fold on the left, the uneven side edges to the right .. I apologize for the poor picture quality.
I pinned the paper pattern on the fabric, starting with the most extreme points (see photo) and continue throughout the piece.
 Then using a pencil and a small ruler, I marked the edge for the cutting of the fabric
 (about 1 / 2 cm)
 I baste with the wire surrounded the model paper, so I removed pins and paper
  again brief. This would be the right time to apply a lining to the pocket, but will not say much any topic of another tutorial (and provided that it could be interesting ..)
 I closed the book and taking as our model to track the basting and I sewn along the lateral sides
 was time then to do the tests .. that is to insert the liner into the bag to the irons and have a look to see if the measures and stability.
 As I took the measures "integral" to the irons of the bag, and then cover the grill and bag are equal probable, even certain, that hails from the liner is necessary.
With this test I checked the were excessive, so I pulled the cover off again and repeated the seam on one side of what is necessary for moving towards the center ... The difference was a lot if I split the surplus between both sides.
Covering the photo above because the pocket is no longer perfectly centered (but it's a cover and it is not serious).
 Regarding the verification of stability have also tapped the handles ... seems to fall well!
  I removed the cover from the bag and measured precisely where to place the handles (handles two hard plastic with a small "start" in canete dubbed)
  handles sewn to the liner as photos
  inserted back into the bag liner and dovetailed with both ends of the lining of the bag (the short side!)
  as well as the central point
  tapped these positions distributing any remaining differences between the bag and cover the grill in between these points
  Hand sewn the lining to the bag below
  but to make things even nicer I sewed (always by hand) and above this seam, a strip of Cañete (the same that was used for the handles),
  to refine more the stock market, and giving greater stability to the top ....
 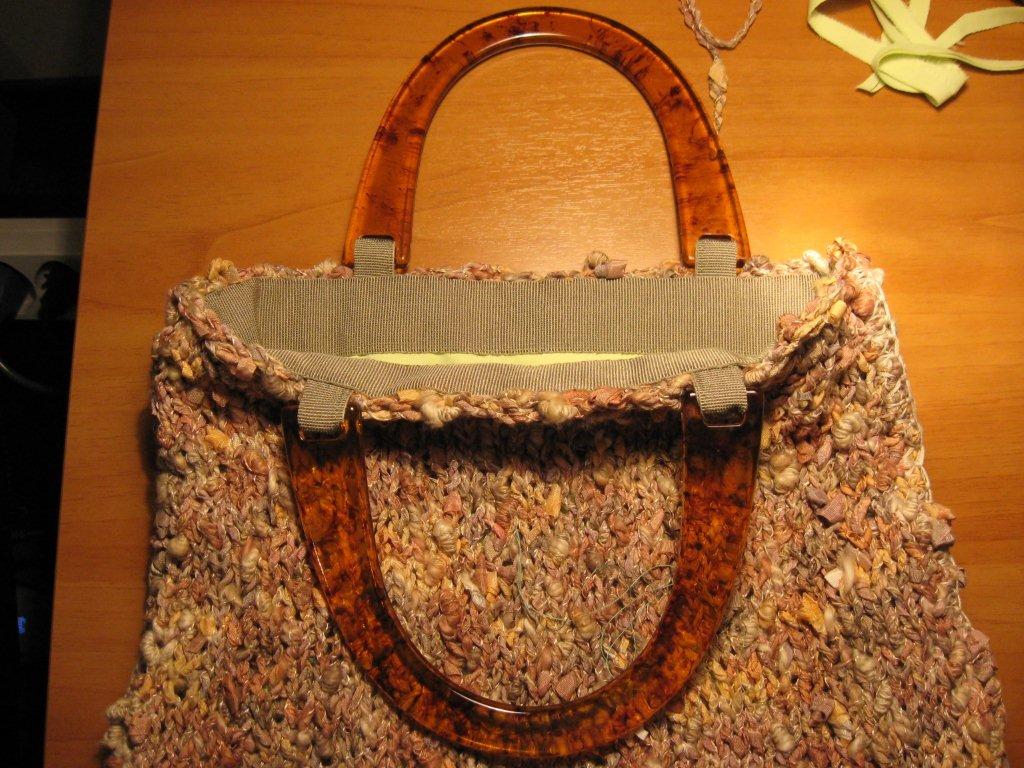 to think of it so that you're holding is a cotton cover that is a bag attached to the irons ... Is not it funny?
 And with this I close the tutorial cover that does not include closing nor knitted, in the hope that it was not too boring ... who would have the possibility of a first-hand experience of the project ... may enroll in the candy!
(deadline September 15)
0 comments:
Post a Comment